Where to Install a Whole House Water Filter in Your UK Home
Wondering “Where does a Whole House Water Filter go?” Short answer: right where water enters your home. Why? So every tap—from your kettle to your shower—gets clean, fresh water. Stick around and we’ll unpack how Whole House Filters work, UK plumbing quirks, and the best Installation & Placement spots!
Is a DIY Whole House Water Filter Installation Right for You?
Whole House Filters sound simple enough. But when it comes to fitting one, the decision is usually between rolling up your sleeves or ringing the local plumber. The right choice depends on your plumbing setup, your confidence with tools, and how much you fancy risking a minor flood on a Sunday afternoon.
When to Hire a Professional Plumber
Sometimes it pays to step back and let someone else handle the spanners.
Complex Plumbing (e.g., soldering, re-routing lines)
If your system needs soldering, copper pipe re-routing, or sits in a tight cupboard, you’ll save stress by hiring a pro. A skilled plumber can complete in hours what might take you days — and with fewer leaks along the way.
Warranty and Code Requirements
Many boiler manufacturers insist that only a qualified installer touches the water system. Ignore this and you risk voiding warranties or failing building regs checks down the line.
When You Can Do It Yourself
Not all jobs need a call-out fee. Some installs are straightforward and very doable with patience.
Basic Plumbing Skills and Confidence
If you can cut pipework neatly, seal joints properly, and know where the stop tap lives, you’ve got the basics. Add a calm approach and you’ll manage just fine.
Replacing an Existing System
Already have a filter in place? Swapping it for a new one is often as easy as unscrewing the old unit and slotting the new housing in. Think of it as a filter “refresh” rather than a major project.
Pre-Installation Checklist
Preparation makes all the difference. Rushing in without planning is the quickest way to end up mopping floors.
Selecting the Best Location for Your Filter
The golden rule: keep it practical and accessible.
Proximity to the Main Water Shut-Off Valve
Position the filter just after the shut-off valve, where water first enters your home. This guarantees every drop — from the shower to the kitchen tap — gets filtered.
Space for Future Maintenance and Filter Changes
Leave enough elbow room for swapping cartridges. Cramming the unit behind the washing machine will have you cursing when it’s time to change the filter.
Tools and Materials
Having the right kit saves endless frustration.
Essential Plumbing Tools (Pipe Cutter, Wrenches, etc.)
At a minimum, you’ll want a pipe cutter, adjustable spanners, pliers, PTFE tape, and a bucket for stray drips.
Plumbing Fittings (Ball Valves, Bypass Valve, etc.)
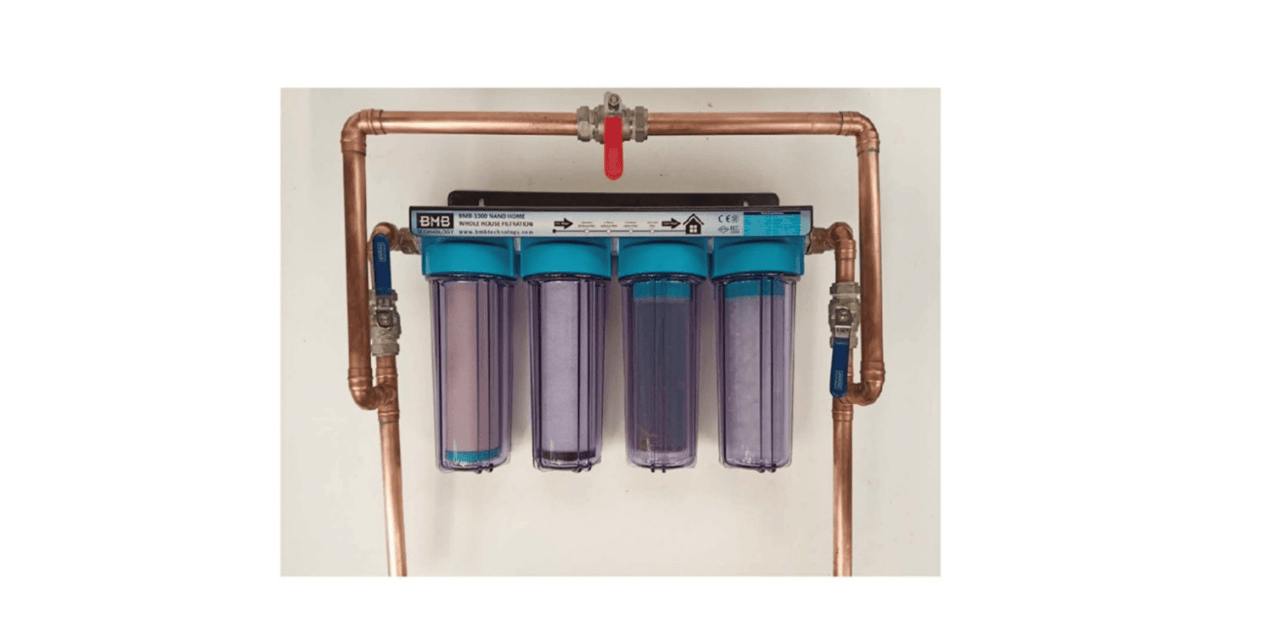
Install shut-off valves on both sides of the filter, plus a bypass valve. This clever three-valve setup lets you change cartridges without cutting water to the entire house.
Step-by-Step Installation Guide
Here’s the practical bit. Follow these steps and you’ll have your filter up and running without too much drama.
Step 1: Turn Off the Water Supply
Close the stop tap and run the taps to release pressure. It’s a bit like letting air out of a balloon — essential before you cut into pipes.
Step 2: Cut Into the Main Water Line
Measure twice, cut once. Use a pipe cutter or hacksaw and expect a small splash of water no matter how well you drained it.
Step 3: Assemble the Bypass and Shut-Off Valves
Fit valves before and after the filter, then add a bypass line. It’ll feel fiddly now but you’ll thank yourself every time you change the filter.
Step 4: Mount the Filter Housing
Fix the bracket to a solid wall or stud. The housing should sit vertical, giving you clear access for cartridge swaps.
Step 5: Connect the Filter to the Water Line
Join everything together with fittings and PTFE tape. Check the arrows on the filter body — water must flow the right way.
Step 6: Turn the Water Back On and Check for Leaks
Open valves slowly. Watch every joint like a hawk — a drip means a tweak, a spray means back to the spanners.
Step 7: Flush the System
Run the taps for several minutes. This clears carbon fines from the cartridge and ensures your first cuppa tastes right.
Post-Installation and Maintenance
You’ve fitted it — now what? Let’s cover life with your shiny new filter.
What to Expect After Installation
Cleaner tasting water is the first win. Appliances will thank you too — fewer chalky kettle lines and happier shower heads.
Common Problems and Troubleshooting
-
Low pressure? Your filter might be undersized for your household.
-
Persistent leaks? Recheck seals and fittings, add more PTFE tape if needed.
-
Strange taste at first? Flush longer — new carbon cartridges often need a proper rinse.
With timely cartridge changes and quick leak checks, your Whole House Filter will keep doing its job quietly in the background.
🔍 Every home is different, let us find the let us find the right Whole House Filter for yours. Reach us by phone on 0121 630 1130 or through the green WhatsApp icon.
More Whole House Filter advice worth reading
How to Install a Whole House Filter
Can I Install a Whole House Water Filter Myself?
Whole-House Filtration System Installation: How & Where
How Long Does It Take to Install a Whole House Water Filter?
Where Is the Best Place to Install a Whole House Water Filter?
Can a Whole House Water Filter Be Installed Sideways?
Should a Whole House Water Filter Go Before or After the Water Heater?
How Long Should I Flush/Run Water After Installing or Changing a Whole House Filter?
How to Install a Whole House Water Filter on a Well
How to Install Express Water Whole House Filter
Whole House Water Filter Outdoor Installation
Should a Whole House Water Filter Be Before or After a Pressure Tank?


Leave a comment